
Filtering Datasets in MP-Web
The Current Dataset can be further refined using the filtering tool, accessed by clicking the ‘Filter Dataset’ link.
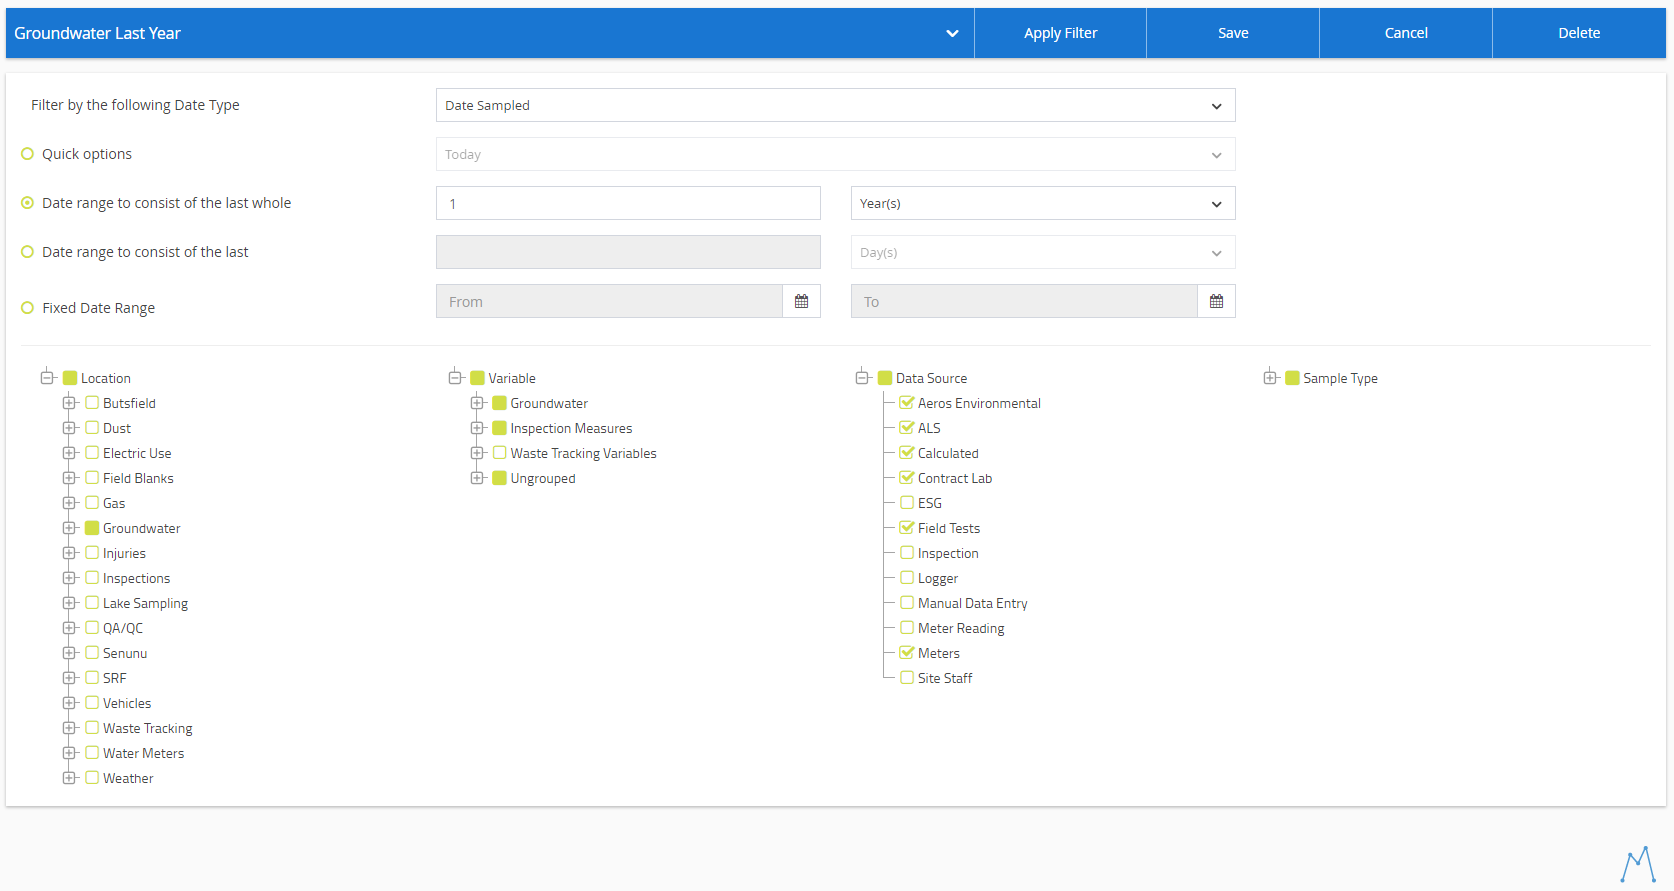
Datasets can be filtered, for example, to omit a particular Sample Point. To do this, expand the Sample Point tree and de-select the Sample Point or Sample Point Group to be excluded.
There are also various data options to filter the data you would like to see:
Filter by the following Date Type - This allows you to choose between 2 date types. Data Sampled is the date the data was originally taken. Date Imported is the date the data was imported into MonitorPro.
Quick Options – These Options are pre-defined windows of time that will make it easier if you know the window of data you will need.
Date Range Consists of the last whole... – This allows you to choose a date range that is a complete window of time. This ranges from the last whole day to the last whole year e.g. if the Data was 1st September 2015 then the data would be from 1st January 2014 to 31st December 2014.
Date range to consist of the last...- This allows you to choose a data range of non-complete windows of time. E.G if the date was 1st September 2015, the date filtered would be from 1st September 2014 to 1st September 2015.
Fixed Date Range – This allows you to specify the to and from date down to the minute of a particular day.
The Tree View can manipulate all of the core objects in a Dataset; Site, Sample Point Group, Sample Point, Variable Group, Variable, Data Source, or Sample Type.
Advanced Filtering
There are also options to filter your Datasets in more advanced ways. These can be accessed by clicking on the Show additional settings at the bottom of the date range settings. This will then expand out the additional options. Users then have the option of additionally filtering the Dataset based upon the Sample Reference, Lab Reference, or Data Qualifier(s).

Sample and Lab References
For the Sample and Lab References simply include the reference on which you would like to filter. You can use wild cards to search for part numbers, such as 101% which would return any references starting with 101. Similarly starting with a wild card will return all the references which end in the provided value, e.g. %101 would return 10101, 11101 etc.
Data Qualifiers
By default, the filter will include all Data Qualifiers. To filter to a specific qualifier then untick the 'All data qualifiers' and click in the box. You will be presented with an option to choose the specific data qualifier(s) you wish to filter upon. If you need further details on Data Qualifiers please refer to the MonitorPro Desktop manual.
As items are checked and unchecked, the number of records that will be returned updates dynamically.
Save – Clicking this will save the Dataset and can be used within MonitorPro.
Apply Filter – Clicking this will temporarily store your changes in the ‘Filtered Dataset’ You will then be returned to the Summary page and can create Tables, Graphs, etc based on the Information you have just filtered.

Managing Datasets within Different Roles
Functionality within the Filter Dataset changes depending on the role a user has.
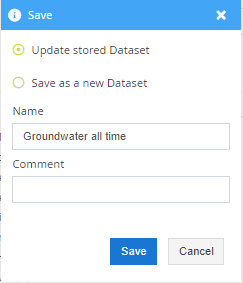
Administrators have permission to both save new Datasets and update existing Datasets. Administrators also have the ability to save Datasets to specific Dataset Folders. Those Datasets can then be automatically allocated to any users who have access to those Folders via Object Access.
Managers, Standard, and Read-Only users can only filter Datasets and save them as new (i.e. a subset), they cannot update and save Datasets that are created by another user.
Users can also add to the contents of a particular Dataset by selecting the ‘Show all’ option, however, what each user sees will be different. An Administrator can see the objects from the whole database. Managers, Standard, and Read-Only users will only see the objects assigned to them, i.e. the combination of all objects from the allocated Datasets combined.
My Datasets Folder
The My Datasets Folder will be available to all users when saving as new. This enables users to make private Datasets for their own use. Private Datasets cannot be seen by other users and not shared directly.
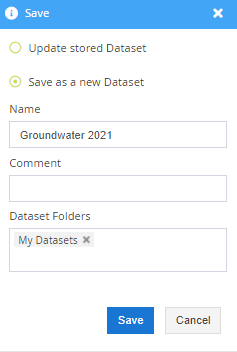
They are then accessible under the My Datasets Folder

Sharing a Private Dataset
To later share a Private Dataset, choose to save it as a new Dataset, and modify the name to make it unique (it cannot be the same name as the Private Dataset or the name of any existing Dataset). Then either don't allocate it to a Dataset Folder at all (in which case it goes into the Ungrouped) or save it directly into a Dataset Folder(s), which are already shared with the applicable users. If you save into the Ungrouped Folder, the Dataset can subsequently be added to the required Folders or allocated to a user directly.