
- Knowledge Base and Manual
- MP-Desktop
- Data Analysis Tools
-
Installation
-
Integration
-
MP-Desktop
-
MP-Web
- Introduction
- Access
- Side Bar Navigation
- Dashboard
- Favourites
- Datasets
- Summary Tab
- Tables Tab
- Export Tab
- Graphical Tab
- Report Tab
- Mapping Tab
- Manual Data Entry
- Calendar Tab
- Action Plans
- Custom Forms
- Contacts and Alerts
- Compliance
- Task Scheduler
- Monitoring Scheduler
- Calculator
- Data Entry
- Email Importer
- Object Management
- Obligations
- Policies
- Administration
- Administration - Manage Users
- Administration - Datasets
- Administration - Internationalisation
- Administration - Email Importer
- Administration - Monitoring
- Administration - Advanced
- Culture
-
MP-Field
-
Release Notes
-
Reporting
-
Configuration
-
Trial and Demo
-
Monitoring Types
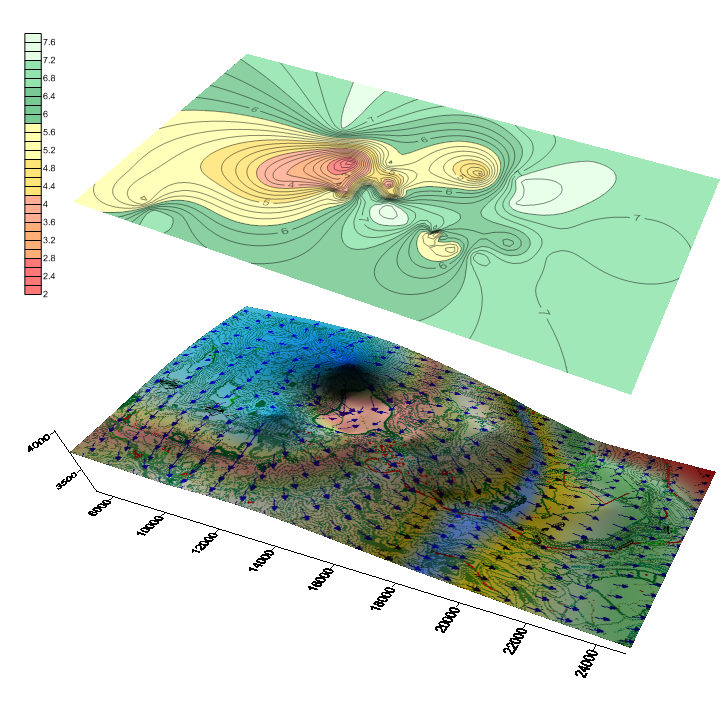
MP-Desktop Contour Plots
How to create Contour Plots in MP-Desktop
Introduction
Contouring automates the export and rapid display of contour plots and classed post maps directly to Surfer. A demonstration version of Surfer is provided (which must be installed for the link to function). This demo version is limited in usage, not allowing for the export of the produced contours or is time-limited (dependent on the version). To export images time-unlimited, a full version of Surfer will be required.
Contour Plot
From any Dataset double click the Surfer icon.

- Give the plot a title if required
- Choose the plot type 2D, 3D, colour, black and white
- Choose the variable(s) and summary operation from the drop-down lists
- The gridding method used is Kriging by default but can be changed using the drop-down box.
- If an underlay map is required, browse to a dxf or shp file
- Click “Create a Map”
Classed Post
In the Classed Post option you will be provided with some additional options.

- The number of Classes - This is the number of ranges you would like to use
- The Point Symbol - The Symbol of the Point/Post
- The Point Size - The Size of the Point/Post
- Point Colours - The option to set the colours for each class

If you wish to automate Surfer output via a Crystal Report tick the 'Remember these settings for this Dataset'. To complete this setup you will need a suitably designed report and a full version of Surfer to save the images. Please contact support@ehsdata.com for additional information.
For further information on various gridding methods, open Surfer and choose Help from the menu, then ‘Tutorial’ then select the section called ‘Gridding’.