
Setting up the Email Importer
These settings need only to be set up initially or if the email account settings change. Certain properties are required for both incoming and outgoing emails.
It is recommended to use a dedicated email account for this so as to avoid possible conflict with other systems accessing this account, such as Outlook, or other email applications. If the account hasn't been newly created then ensure you choose an appropriate date in the 'Only download emails received after' date. This will avoid importing unwanted files already sent to the mailbox. The Email Importer will also only pick up emails that are unread. If users or other applications mark these emails as reading the Email Importer may fail to process the emails as desired.
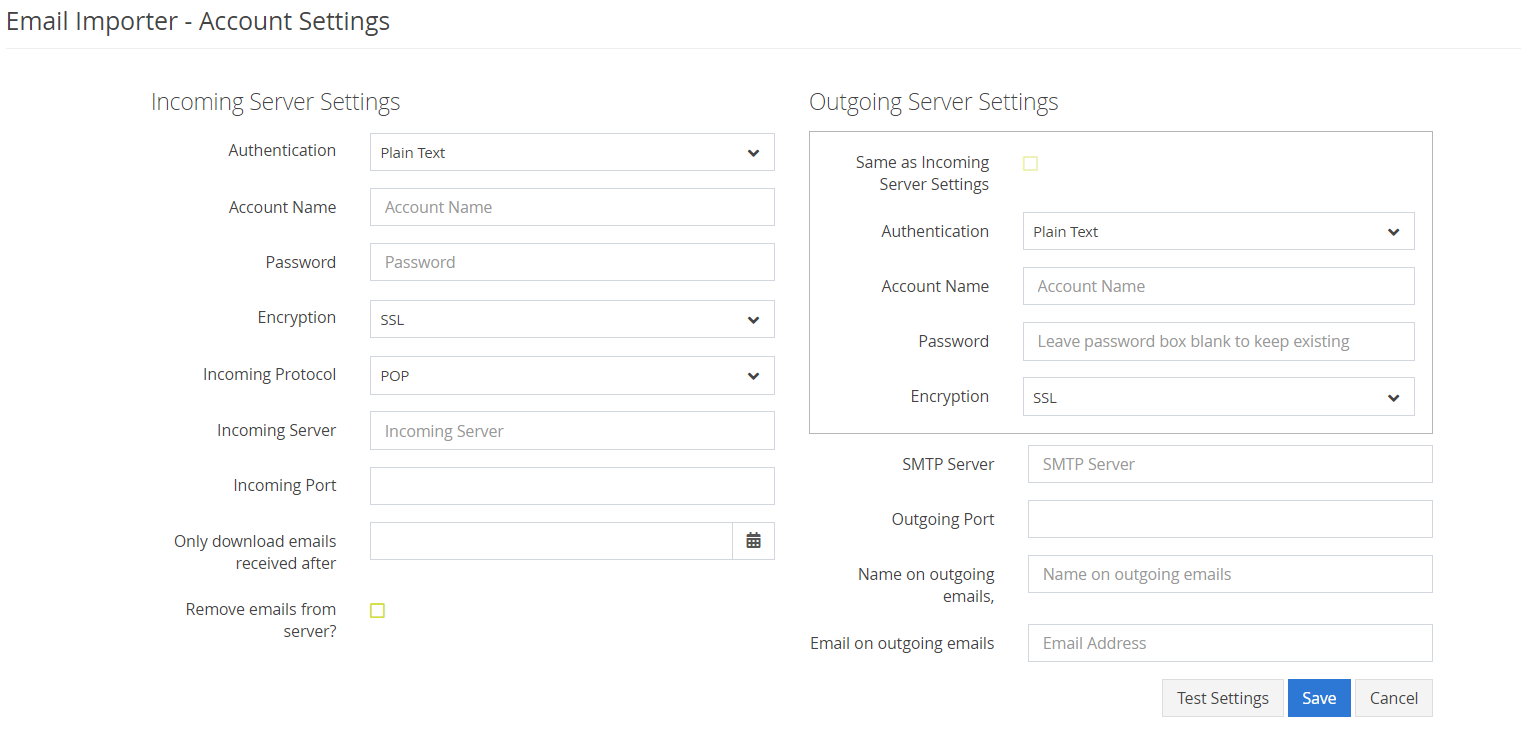
The authentication dropdown allows you to pick between ‘None’ and ‘Plain text’. If your email server requires you to log in with a username and password, you will need to select ‘Plain Text’, if it does not then select ‘None’. ‘Account name’ and ‘Password’ are where you need to specify the login credentials for the account. The ‘Encryption’ box allows you to specify if the server uses ‘None’ (no encryption), ‘SSL’, or ‘TLS’ encryption types. For Exchange Online, see the separate section on the required setup.
The ‘Incoming Server settings’ section includes the Incoming Protocol, either ‘IMAP’ or ‘POP’, the incoming server address, and the port number used to connect. Finally at the bottom is an option ‘Remove email from server’, checking this will mean that as the email processor downloads each new email it will be removed from the incoming email server. This is useful where the mailbox has a size limit and will ultimately stop the Email Importer from working once the mailbox reaches this limit. If this option isn't used then the mailbox should be routinely cleared.
The ‘Outgoing Server Settings’ allows you to set the outgoing server address, and the port number used to connect to it. You can also specify the name and email address that you want to appear on the outgoing emails. Note, that some spam and firewall filters can block emails coming in if this address does not match that of the account which sent it, so you may need to confirm this before using something other than the account login email address.
All the details you will need on this page will be provided by your IT team and any issues that arise should be passed to them first to ensure all details are correct and working before contacting EHS Data support. At the bottom of the page, there is a ‘Test Settings’ button, which will attempt to both read the inbox of the email account, and send a test email to an address of your choosing. It will do this using the details currently displayed on this page, and will not save anything into the database until you tell it to by clicking the ‘Save’ button.