
This page outlines the steps required to install and configure MP Web for first use
Please ensure prior to attempting to setup MP Web you have liaised with EHS Data and your MP5WebGateway SQL database and MonitorPro data database have been setup, as well as referring to the Web Server Preparation page. If unsure on any of this please get in touch with your allocated account manager via email or email support@ehsdata.com.
Firstly, you'll want to have the folder open ready where you have extracted the MP Web files.
You'll want to open IIS Manager, right click sites, and Add Website: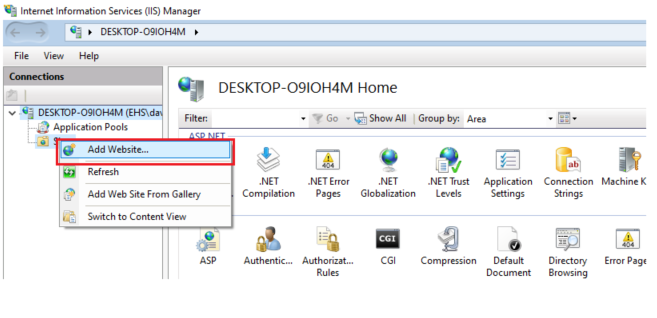
Once the Add Website dialogue is open fill out the Site name, set the physical folder path for where the MP Web files will be contained, and then set your binding for the website: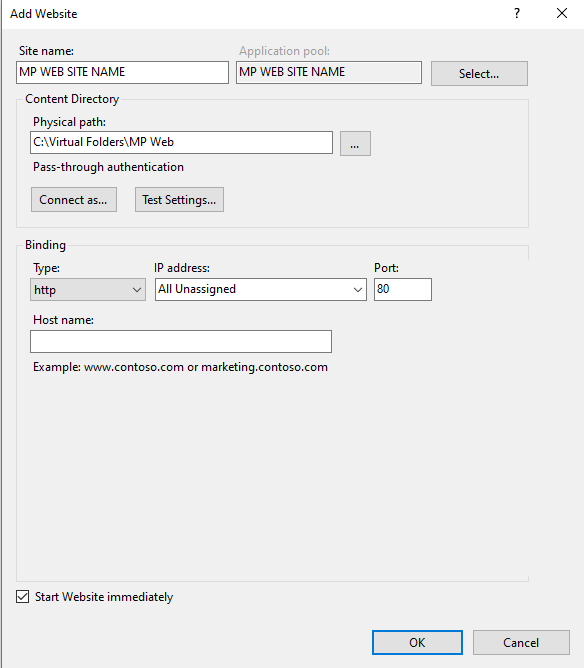
Once you've setup the website and created the directory for the MP Web files you'll want to then copy the contents of the extracted ZIP into the directory you've just created:

Once you've copied the files you'll need to open the appsettings.json file in a text editor such as notepad or notepad++. Once open scroll down and find the section which contains the connection string for MP Web:
In this section is where you'll set the SQL Server name and port/instance name if a custom port or instance name is in use, the MP5WebGateway database name and whether you'll be using WinAuth or SQL Auth to connect to the database for MP Web.
The following options need to be set:
Server=SERVERNAME - Replace SERVERNAME with your SQL server name and ensure to include the instance name or port number if a custom instance or port is in use e.g. EHSSQL01\EHSDBSERVER or EHSSQL01,12345
Database=MP5WebGateway - Replace MP5WebGateway with the name of your gateway database. If EHS Data has set this up it will typically be just MP5WebGateway so this may not need changing.
Trusted_Connection=False - Change this value to True if using WinAuth to connect to the database or leave this as False if using a SQL User
User id=ENTER_USERNAME - Replace this with the username of your SQL user if using SQL Authentication to connect to the gateway database
Password=ENTER_PASSWORD - Replace this with the password for the SQL user being used to connect to the gateway database
To view more information on configuring SQL and Windows based authentication for the purpose of connecting MP Web to the database please click here to view the associated knowledgebase article.
Once the appsettings.json has been configured save your changes and navigate to IIS.
In IIS expand the folder structure of the MP Web website, look for the folder called Reporting, right click and select Convert to Application. On the Add Application screen leave the default settings and click OK. The icon of the reporting folder should then change as shown below;

Once you've completed the above go back into IIS and select browse to go to the website: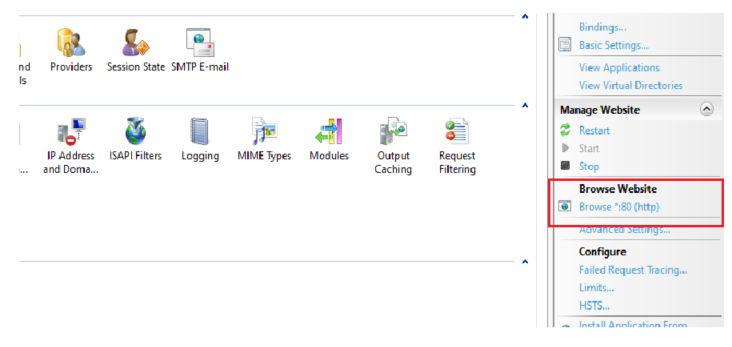 If all has been configured correctly you will be presented with the following page to configure MP Web for the first time:
Complete the form with the details requested, if you're unsure of your company code then please get in touch with your allocated account manager or the support desk via email at support@ehsdata.com

If your installation of MP-Web is able to communicate with our registration server it will automatically configure your available package(s). If this fails you’ll be prompted to enter a feature key instead, for offline activation. These can be obtained by contacting support@ehsdata.com.
After logging in with these details, you will first be given a page that will show the available User Feature Packages and Features based on your license agreement:
Following activation of the feature package and/or features, you will then need to setup the required users and databases.
Navigate to ‘Administration’ on the main navigation menu and select ‘Edit database list’ under the ‘Database Access’ section. At present this will be empty, but at the top of the screen you will have a small form allowing you to add a new entry. If you have more than one MonitorPro database you will need to repeat this step for each one.

The ‘Database Name’ is the actual name of the MonitorPro database as seen in SQL Server Management Studio. You will need to enter this exactly as you see it there.
The ‘Display Name’ can be anything you want, this is just the name that users will see when selecting which database to connect to.
The ‘Server’ is the name of the SQL Server Instance where your MonitorPro database is stored. Most likely this is the same instance on which the MPWebGateway database was created earlier, but depending on your IT setup might be different. As with the connection strings in the previous stage, if your SQL Server has a specific instance name, or uses a nonstandard port number, these will need to be included here too.
Select the correct login procedure for your database, either Windows Authentication or SQL Authentication. If Windows Authentication, please refer to the MP Web SQL & Windows Authentication Connection page to ensure this has been setup correctly prior to attempting to add the database using windows authentication.
Next, navigate back to ‘Administration’ on the main navigation menu and select ‘Add/Edit/Delete User Accounts’ under the ‘Manage User Accounts’ section. From this next page, select your initial First user created when first configuring MP-Web above. This First User is automatically set as an admin account, therefore, you should just assign whichever feature package and/or features are required for this user and click update at the bottom of the page:
Your MP-Web installation is now complete, and fully setup.
You can now log in with your first admin user and refer to the main manual on how to assign database connections and datasets.