- Knowledge Base and Manual
- MP-Desktop
- Calculator
-
Installation
-
Integration
-
MP-Desktop
-
MP-Web
- Introduction
- Access
- Side Bar Navigation
- Dashboard
- Favourites
- Datasets
- Summary Tab
- Tables Tab
- Export Tab
- Graphical Tab
- Report Tab
- Mapping Tab
- Manual Data Entry
- Calendar Tab
- Action Plans
- Custom Forms
- Contacts and Alerts
- Compliance
- Task Scheduler
- Monitoring Scheduler
- Calculator
- Data Entry
- Email Importer
- Object Management
- Obligations
- Policies
- Administration
- Administration - Manage Users
- Administration - Datasets
- Administration - Internationalisation
- Administration - Email Importer
- Administration - Monitoring
- Administration - Advanced
- Culture
-
MP-Field
-
Release Notes
-
Reporting
-
Configuration
-
Trial and Demo
-
Monitoring Types
MP-Desktop Factor Tables
How to manage and setup MP-Desktop Factor Tables
Introduction
Factor Tables can be used to reference changing values consistently in MonitorPro calculations. These could be Emissions Factors or commonly well top or ground survey levels. Changes over time can be recorded, so historical updates can be accounted for and correct values referenced if historical data is imported or updated.
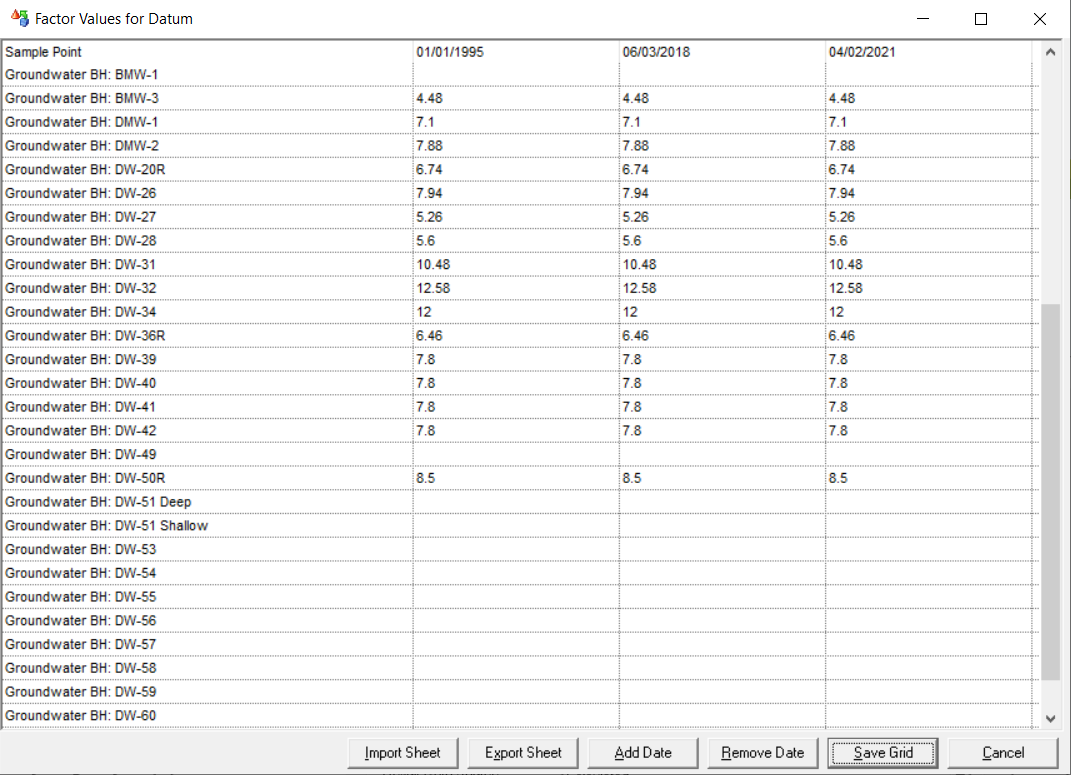
The example below for Groundwater Wells and their corresponding changes over time.

Adding a new Factor Table
Complete the General Tab with a suitable name for later referencing.
Factors can be applied as a single value applicable to all locations. This might be the case with examples such as Emission Factors which would be applicable at any/all locations where they are referenced.
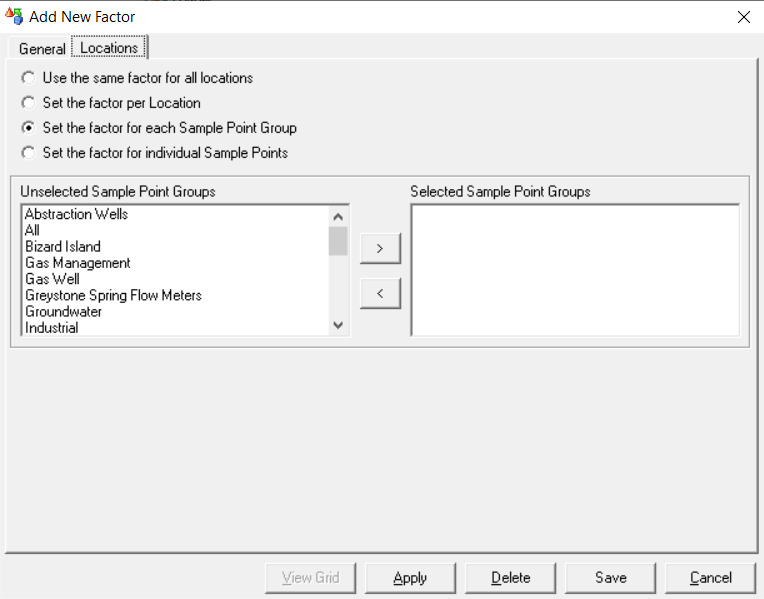
This can be made more granular with reference to a specific Location (Site/Data Type), a Sample Point Group, or most commonly for well top surveys, at individual Sample Points.

Depending on the option chosen, the unselected will update with the required Objects to select from the left (unselected) to the right (selected). Once these have been added, Save and you'll be prompted if you'd like to edit the Grid. Confirm and then proceed to set up your Grid.
You'll first be required to select a date from which the Factors will be applicable. In the example of well tops, this is generally the survey date.
Users can manually add the values cell by cell. Equally, the Export Sheet option can be used to update the values in Excel. The Import Sheet can then be used to mass update the Factor Table.
Warning
Do not add new dates (columns) or Sample Points (rows) to the file before importing. If you notice omissions or mistakes in the Grid you will need to add them to the Factor Table, apply them and then Export the sheet again. Failure to do so can lead to incorrect import of the Factor values.
