How to create a Scheduled Task in MP-Desktop
Scheduled Tasks can be accessed from the Control Panel\Scheduled Tasks. Add a New Scheduled Task or edit an existing one. A dialog will open up for the user to follow along with the required setup.
General
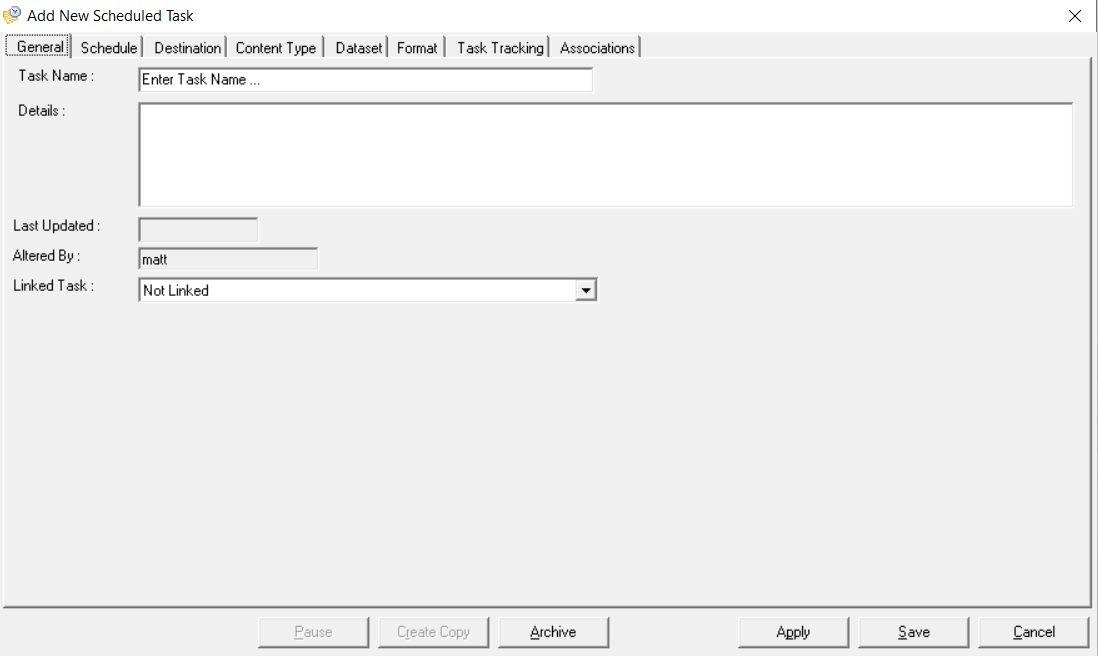
Provide a suitable name for the Task which depicts its nature and ideally frequency for later retrieval/identification. Additional information can also be stored in the Details section.
From here you also have the option to link this task to another task. Linked Tasks are typically used to provide follow on actions, once one Task is complete another will become due based on the delay set. Simply choose the Linked Task at this point and the offset is added in the next step.

Schedule
The Schedule tab enables the user to set the periodicity of the required Task.
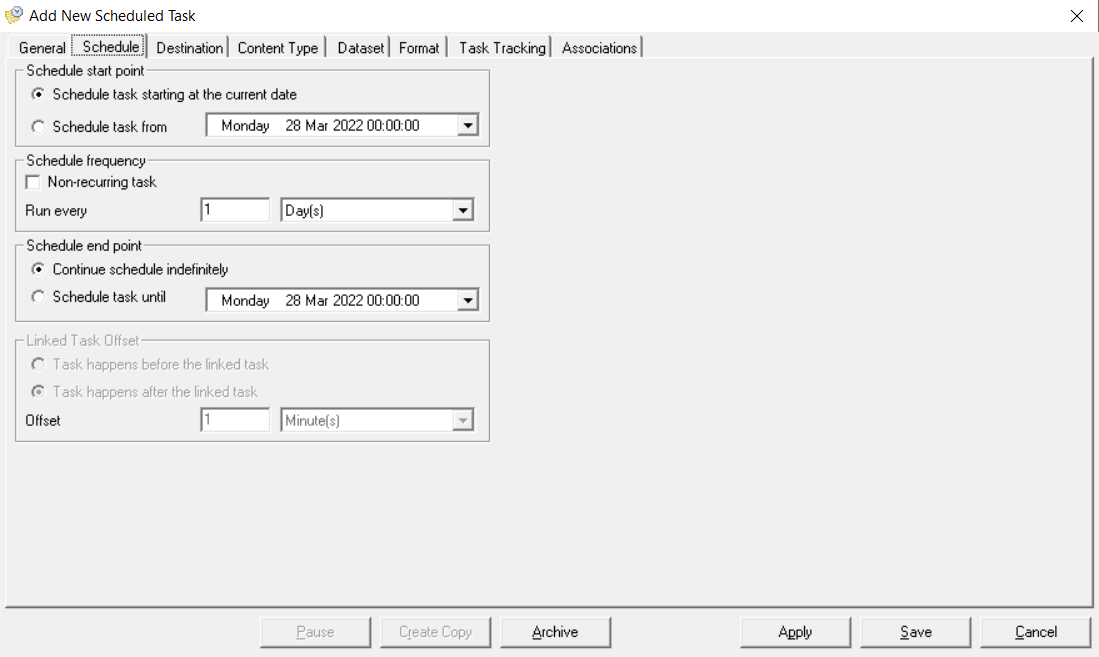
Tasks can be scheduled from the current date or a specified date in the past or the future. The date chosen will then set the scheduling for all future Tasks incorporating the details entered for the reoccurring.
Tasks can be set to be non-recurring for one-off events. Otherwise set the frequency of the Tasks from Hours to Years.
Users can also set Tasks to end at a particular date or leave them to run indefinitely.
The Linked Task setting will only be accessible if this has been previously set on the General tab. If this is not required leave this step. If a Linked Task was set then the Scheduling settings will be inaccessible. In a Linked Task, the periodicity is controlled by the Linked Task. Users have the choice to select if this Task is simply before or after and a lead-in/delay.

Destination
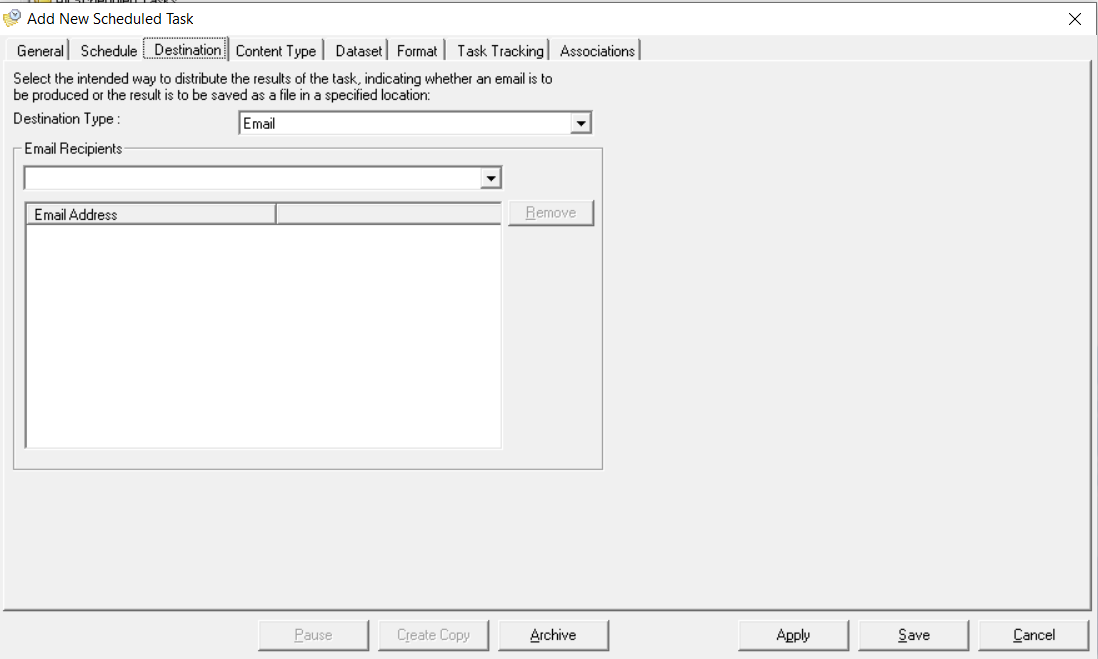
The Destination tab controls the output of the Task. Users can choose to email or save to file. When emailing, users will be presented with a list of Contacts who have a valid email address in the Recipients list.
If the user chooses to save to file then the base location needs to be set. Ensure that the full path (\\SERVERNAME..) of the location is included. Following this users can choose how to denote the file, either overwriting each time or appending a number or date to make each export unique.

Content Type
The Content Type is either a Report or an Export if output to file, and a Report, Export, or Email reminder if the output is set to Email.
Reports will display all the accessible Crystal Report templates, which are saved in the Server Reports Folder path. To update the list accessible users will need to add any Report templates to this location and run manually or wait for the Task Scheduler to run (every 30mins). Reports included in the list can be either Dataset based or Other reports. Exports will display the standard export types plus any custom exports which have been added to the system.
Dataset
This tab may be disabled depending on other settings chosen. Either the report isn't Dataset based or the Task is simply a reminder Email. Otherwise, choose the Dataset which is required for the output Report/Export. The final three settings are used to manage the output depending on the data available. Users can choose to skip if no data (within the Dataset confines) is found at the time of running, skip if there are no breaches, or if there is no new data since the prior run.
Format
The Format tab enables the look and content of the Email to be configured. Simply include the required standard text for the email subject and body. Special Inserts can be included from the dropdown menu. These inserts will then populate the appropriate Date, Location, Task Name, etc at run time.
Task Tracking
Task Tracking enables oversight of a Tasks completion in a timely manner. To turn on tracking select the tick box to require sign-off of Tasks. Then select the appropriate Contact who is responsible for closing out the Task along with an appropriate offset. A Task will be created based on the settings from the earlier steps, the time to complete adds a delay before the task becomes overdue. For example, a monthly reoccurring Task will be created/sent in an email on the 1st of the month, but a time to completion of 1 week will delay the overdue status for this duration.
Escalation can be used to email a Contact should the Task not be completed in the time specified. Select the Contacts name from the list who will be notified at the point the Task becomes overdue.
