
The MP-Desktop Monitoring Schedule Schedule Tab
The Schedule Tab sets the business logic around the expected frequency of the Monitoring Schedule. It's also the hub for configuring the expectations around collection periods and analysis periods.
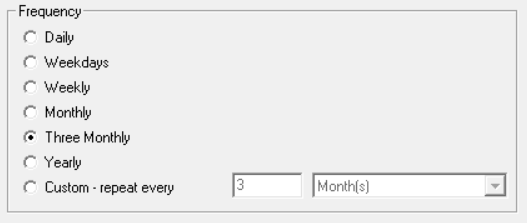
Frequency - Set here the frequency of the Monitoring Schedule. A Monitoring Visit (child of the Monitoring Schedule), will be automatically created for each period selected, for example, a Monitoring Visit every 3 Months. This frequency also sets the 'Visit Window', where data is expected within that date range. Data collected before this period or after this period will fall into the previous or subsequent Visits.
Starting From - The starting from date will default to the current date. It can be desired to set the starting date back to a specific date, such as the 1st of the current month, or the Monday of the current week. In the quarterly example above, it might be desired to set the starting date to be April 1st to have Visits commencing on April 1st, July 1st, Oct 1st, and then Jan 1st.
You can set this date to be further in the past, but be aware a Visit for each period will be created, which may not be wanted if the data to match this Schedule has yet to be collected or entered into MonitorPro.
Next Visit Records Planned for - This can generally be left alone on creation. If editing an existing Monitoring Schedule this date will indicate the next Visit in the sequence to be created.
Tip
If you have updated/made changes to the Monitoring Schedule, and you would like to apply these changes retrospectively to Visits that have already been created, you can 'set back' the Next Visit planned for date, to a date in the past. This will have the effect of recreating those historic Visits with any applied changes, next time the Monitoring Scheduler runs (every 30 mins). This does not affect or delete data, however, the Visit(s) will be cleared and then recheck for matching data.
Previous Visit Record date - This date will indicate the date of the previous Visit in the sequence.
Samples to be taken within - This setting manages the expected timings for Sampling/Monitoring to be completed and Field data entered into MonitorPro. As per the working example of a Quarterly Visit, a Visit will be created for each quarter. Monitoring data entered into MonitorPro will match the Visit if it has a sampling date that falls within this Visit Window. It may be desired though to set a stricter control on conducting a quarterly monitoring event in the first month of the quarter, to allow for analysis, repeat sampling, omissions, and reporting ahead of the quarter-end. If that was the case, this would therefore be set to 1 month, or whatever is appropriate. This sets what is referred to as the Sampling Window.
Note
It's this setting that manages the Visit Status and the Alerts. Even if you have a quarterly Visit, the Status will update based upon this setting, not the overall frequency. Thus alerting issues ahead of the end of the Visit Window, when it may be too late to rectify any problems.
Analysis Period - This setting controls the delay in laboratory data returning to MonitorPro after analysis. Set this period to be the maximum/contracted time of analysis including any transport and reporting time. This setting also controls the Visit Status' and alerts with respect to laboratory data, not the Visit Window set in the frequency. Along with the Sample Date, this sets what is referred to as the Analysis Window.

Note
For more details on how these settings affect the overall Visit Status please check out the following article Monitoring Schedule Visit Status
Initial Date Offset - The initial date offset allows you to control the day of the week a monitoring event is programmed. For example, you may be required to complete monitoring monthly, and set up the Monitoring Schedule with a monthly Frequency, starting from the 1st of the Month. However, you may only go monitoring Mon-Friday and occasionally the 1st may fall on a weekend. In this scenario, you may wish to set up the Schedule to start on the '1st Monday'. If monitoring is required on the 3rd week of the month for example due to access or availability, this is also an option. Equally use the 'fixed day' option to set the date planned due date to a specific date in the month.
Note
Amending the initial offset does not affect the Visit Window or the Original Planned Date, it's simply a way of amending the Planned Date automatically. This can be simpler than having to manually revise the date each quarter to reflect when monitoring will be completed.
Hierarchical Monitoring Schedules - Hierarchical Monitoring Schedules are used to link together common monitoring events. For example, if there are requirements to monitor for Groundwater Monthly, however Quarterly and Annually slightly more monitoring locations are to be included, or greater levels of analysis are to be completed, these Monitoring Schedules can be linked in a hierarchy. This has the benefit of not duplicating monitoring Visits and streamlines data collection in MP-Field.
As normal, each Monitoring Schedule needs to be made starting ideally with the most frequent (in this example the Monthly). Include the Sample Points and Sample Templates relevant for the Monthly. Then create the Quarterly, and on the Schedule tab include the Monthly Schedule. In the Sample Point and Sample Template tabs of the Quarterly Schedule, only include the additional objects and analysis required for the Quarterly (you will see the Monthly objects in italics). Repeat this process for the Annual, linking the Quarterly to the Annual and adding anything extra. Further refinements can be made using the Grid if needed, to accommodate differences between the Schedules. It should be said though that the hierarchy is designed to work for examples such as this, and not necessarily complex or atypical scenarios, where perhaps the Schedules don't align as clearly.