
How to manage Visits in the MP-Web Monitoring Scheduler
Introduction
Visits are the children of the parent Monitoring Schedules. A Visit will be automatically created in advance of the Original Planned Date, as per the details held in the Monitoring Schedule. They can be further modified once created, however, changes made to them would only apply to this one instance and not future Visits. This can be helpful where one-off additional analysis or sampling is perhaps required, or amendments need to be made ad-hoc. Simply make the changes to the object tabs, and then save those changes for them to take effect.
Note
If changes are made, note that in MP-Field a user will need to redownload a Visit for these changes to apply. If the user is partway through the Visit in the field, they can simply upload what they have done (when they have an internet connection) and then redownload the amended Visit.

These Visits can be viewed from the Calendar, the Visit Status List, and accessed in MP-Field.
Note
If a Visit is not present when expected (i.e. the date has passed beyond the next expected planned date), it is possible that the MonitorPro Service has stopped and an Administrator will need to investigate. First, check that the Monitoring Schedule has not been modified by another user or set to be inactive.
General
The General tab of a Visit will provide the basic details of the Visit and its status.
Visit Ref - This is a sequential reference number provided to the Visit by MonitorPro. The starting value and a prefix can be modified in System Options/Proactive Settings.
Status - The Status on the General tab allows the Status to be manually updated. This might be because the Visit is not needed and can be cancelled or the user wants to manually update the Visit to be complete. This Status will update automatically to be completed when the data count reaches the auto-complete percentage (typically 100%).
The Visits check for data periodically and when data is imported. There shouldn't be a specific need to manually Recheck a Visit's Status, however, when manually manipulating data this is an option to instantly see what impact this has on the percentage complete. Automatically, the Monitoring Scheduler runs approximately every 30mins and will update any changes or data imports after this time.
Objects
Objects including the Exclusion Grid can be modified, however, these changes will only be applicable for this since Visit, such as adding additional sampling above the normally required range.
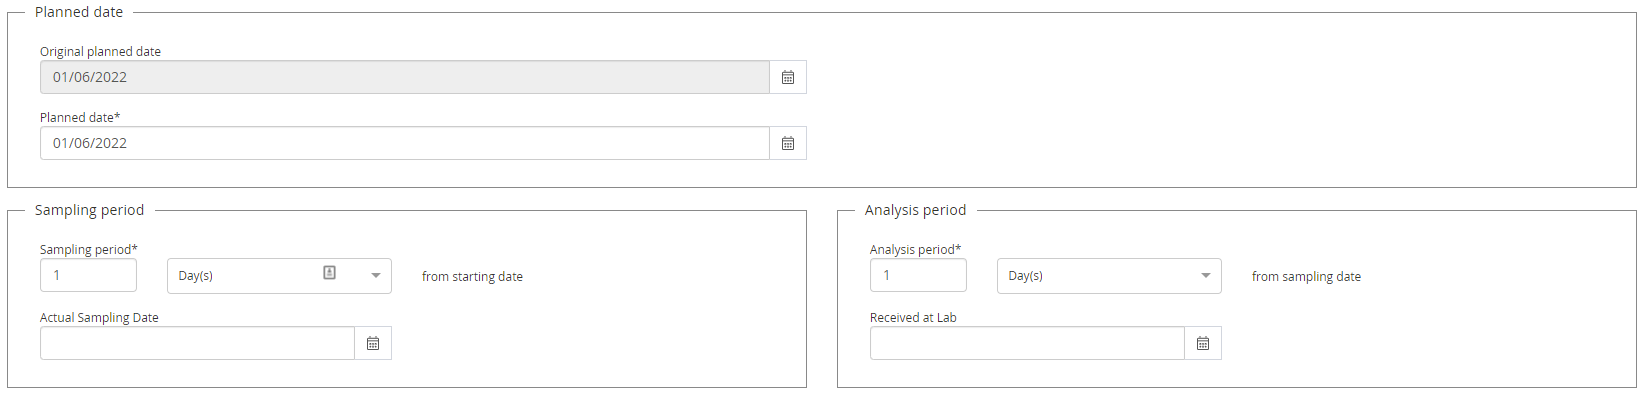
Progress
Original Planned Date - The Original Planned Date will be based upon the Start Date and the Frequency as detailed in the Monitoring Schedule. So a monthly Visit starting on the 1st of May will create Visits in June, July, August, etc. on the 1st of the month. Each Original Planned Date will always be the 1st in this case.
Revised Planned Date - It's clear that in most cases not all the required monitoring will be completed on the 1st of the month every month. So the Revised Planned Date gives users the option to move the actual date of monitoring to when it's convenient to do so. The Revised Planned Date must fall within the Visit Window (in the above example, monthly) to avoid it running over into the next Visit.
Tip
To help automate this process users can use the Initial Date Offset function on the Schedule tab of the Monitoring Schedule, to automatically control the revised planned date to a more suitable day. For example, a company might have 4 rounds of monthly monitoring to do across different aspects of monitoring. They could all be scheduled to be completed from the 1st of the month, but the offset used to schedule the Revised Planned Date throughout the month, or in the same week but on different days.
Status tab
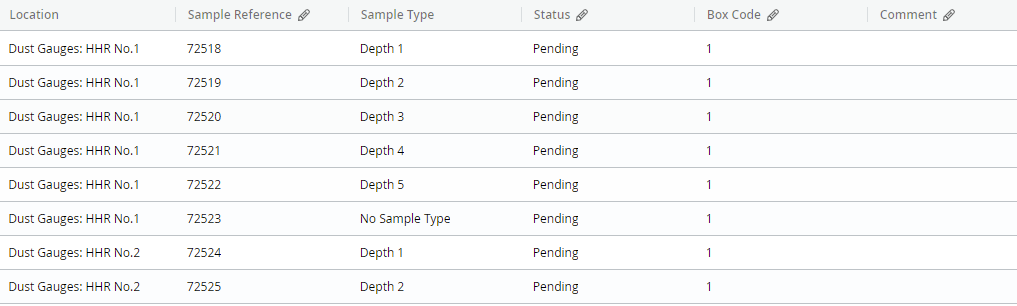
The Status tab allows for further insight into the current status of the Visit and allows users to update the status of individual Samples. When data is imported the Sample Status will automatically update to be Sample Taken. This Sample Status can also be set by the user in MP-Field and it can be imported from a file using the Variable mappings located in System Options.
When a file populated with results for the Sample Taken Variable is imported, readings for 'Sample Taken' are scanned for values of Yes, Y, True, or T. Where these are found, the Date, Sample Point, and Data Source are compared with outstanding samples. These are then marked as having been taken automatically.
Sample Comments can be added in the same ways. If necessary, manually make the required changes and Save or Apply.
Replicates
Replicates are automatically managed via the Monitoring Scheduler settings, however, they can be modified on an ad hoc based from the Status tab of a Visit. If additional Replicates are required, click on the Sample Point you'd like to replicate and then use the Add Replicates button to add an additional sample(s).