
- Knowledge Base and Manual
- MP-Web
- Manual Data Entry
-
Installation
-
Integration
-
MP-Desktop
-
MP-Web
- Introduction
- Access
- Side Bar Navigation
- Dashboard
- Favourites
- Datasets
- Summary Tab
- Tables Tab
- Export Tab
- Graphical Tab
- Report Tab
- Mapping Tab
- Manual Data Entry
- Calendar Tab
- Action Plans
- Custom Forms
- Contacts and Alerts
- Compliance
- Task Scheduler
- Monitoring Scheduler
- Calculator
- Data Entry
- Email Importer
- Object Management
- Obligations
- Policies
- Administration
- Administration - Manage Users
- Administration - Datasets
- Administration - Internationalisation
- Administration - Email Importer
- Administration - Monitoring
- Administration - Advanced
- Culture
-
MP-Field
-
Release Notes
-
Reporting
-
Configuration
-
Trial and Demo
-
Monitoring Types
MP-Web Output - Manual Data Entry Tab
MP-Web Manual Data Entry
To simplify data entry, it is advisable to create specific Datasets for this purpose. Then the sources, Sample Points, and Variables can be limited to only those required. Also, refer to the Associations Section in Administration for ways to simplify data entry further for the end-user.
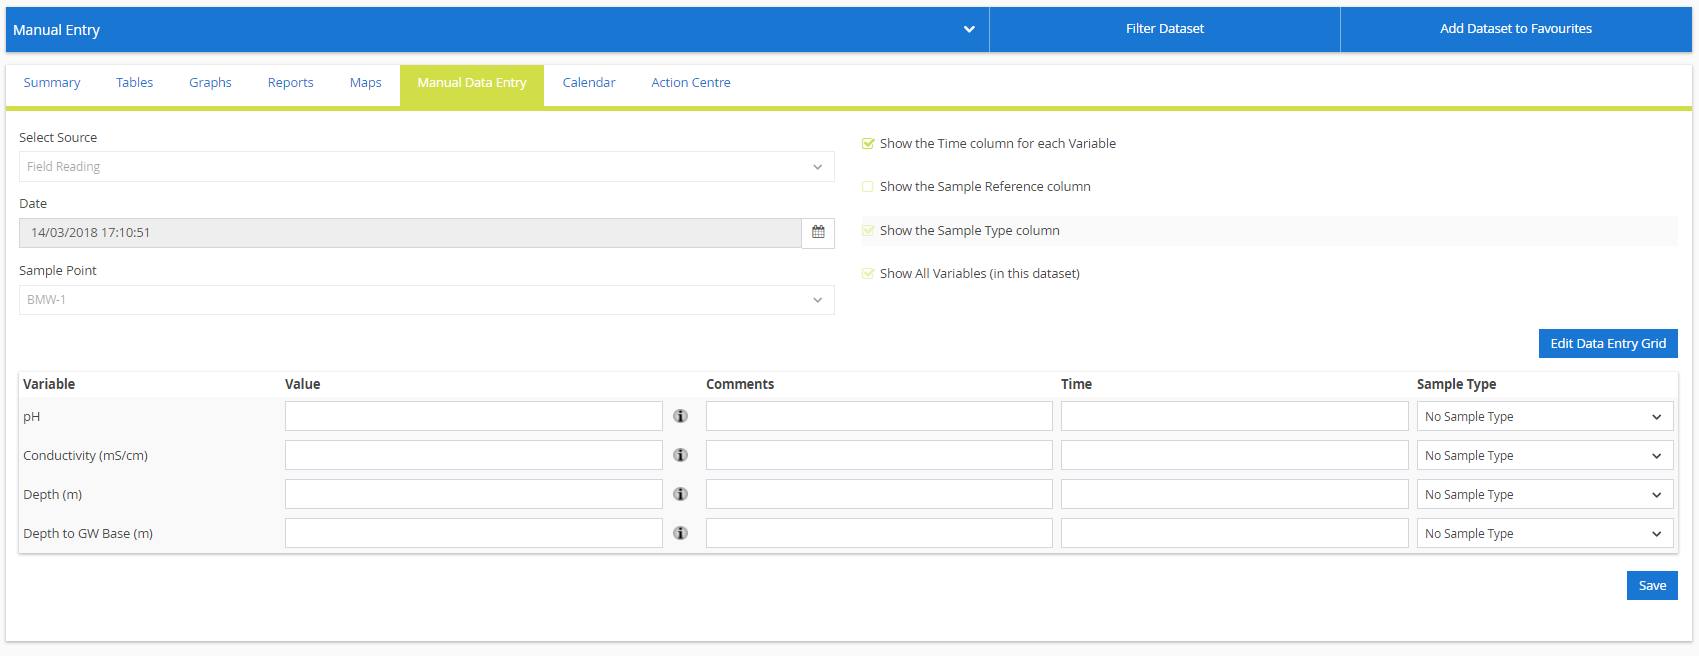
First, select the required Data Source you would like to enter data against. Then populate the sampling date and, if required, time. Then select the required Sample Point from the drop-down list. If a time is included at this stage, each row in the data entry grid will include this time (it’s important to use this function when you are using one of the on/off Variable Type settings). There are checkbox options to choose if a time column is needed to enter sampling times per row, Sample Type and if a Sample Reference is required. Then click Show Data Entry Grid.
 Fill in the Data Entry Grid as required then click Save Data to commit to the database. Only rows that contain a value set will be imported.
Manual Data Entry Options
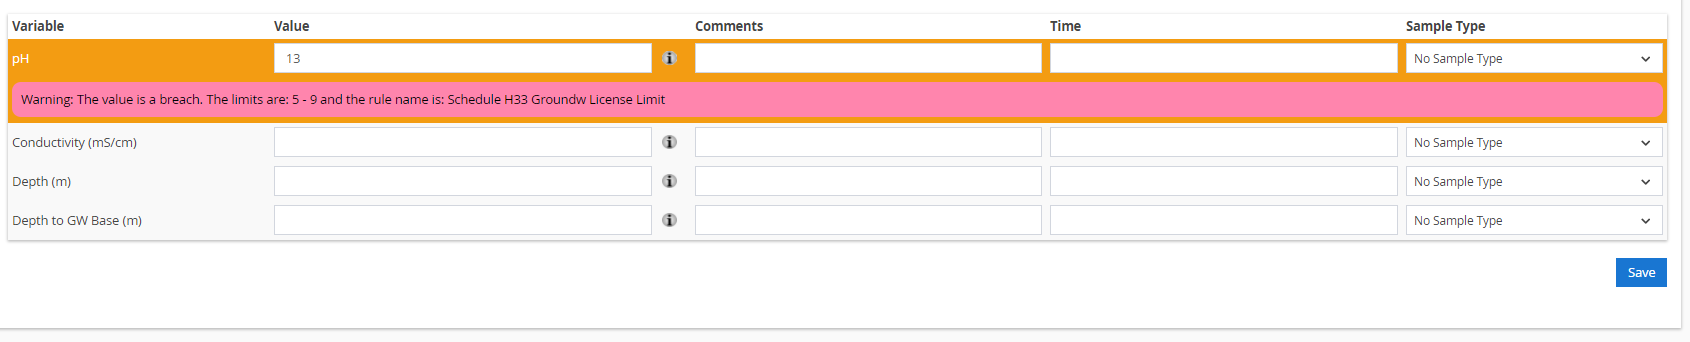
Hovering over the information icon next to the value field will show additional information; this can vary depending on what the current Variable Type is set to. If no Variable Type has been set, the last reading will show up in the tooltip.

 The above screenshot is displaying a tooltip containing details of the last entry made for this Variable. In this case, showing the last reading and an expected range.
If the value entered is above the expected range, a warning message explaining this will appear. The Variable Type setting can be changed via Control Panel > Object Management > Variable Type Settings and selecting the relevant variable from the dropdown.