
How to setup calculations with the MP-Desktop Calculator
Introduction
Generic Calculations can be accessed from the Control Panel\All Calculations\Calculations. Calculations can also be added to Calculation Suites. These are common groupings of similar types of calculation and can be used for quick access. Right-clicking on a Calculation Suite allows users to add and remove Calculations from each Suite. New Suites can be created from the Add New Calculation Suite option.
Overview tab
Give the Generic Calculation a suitable name that clearly defines the purpose or function of the calculation. There is a check box for Active/Inactive, which will be set to Active by default. If a user is unsure of the setup of the calculation or needs to refer back to it later, then it can be partially saved in an Inactive state.
Finally, set the number of decimal places for the output value. Typically this should match the precision of the incoming data, so as to not lose or infer greater precision than is inherent in the base data.
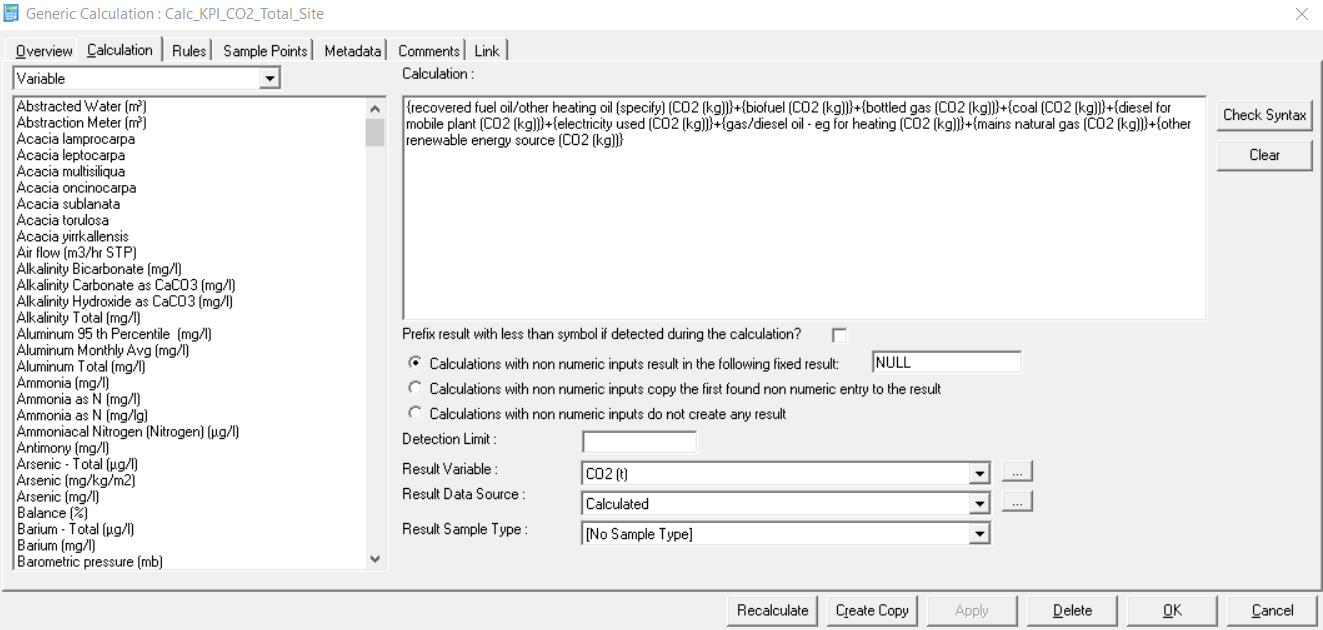
Calculation tab
This is where the logic of the calculation is set up.
In the top left-hand corner is a drop-down that enables the user to select the type of Object or Function to include in the calculation.
Variable - This will give a list of all the Variables in MonitorPro for the user to include in the calculation. Selecting a Variable from the list by double-clicking will add it to the calculation window. The Variable name will be surrounded by { } brackets/parentheses. Do not change this syntax or naming. They can be deleted from the calculation window using backspace to remove them.
Function - The Function offers the mathematical logic which can be used in a calculation, such as IF, Power, Log etc.
Constants - Will show the list of Constants setup in MonitorPro by the users. For fixed values such as Pi or with unit conversions, it's advisable to use Constants and not simply include the value. Just including the value can be quick, however, it can be difficult for future users to understand the reference or meaning of the value.
Factor - A Factor is similar to a Constant, with the fundamental difference that a Factor can change over time, whereas a Constant does by definition not. Even more so with Factors, it's important to not add these as direct values, otherwise, multiple calculations which reference this value could need updating if the Factor changes. These are typically Emissions Factors or well top/survey values to be used when calculating reduced or above ordnance datum values.
Note
As well as the Functions, for simple mathematical logic such as +, -, *, and / you can use the keyboard to type these into the calculation directly.
Such as {Variable A} - {Variable B} or {Variable A} * {Variable B}
Syntax - There are examples offered of the syntax required for some common calculations. Equally, some Functions will provide a basic layout of the expected syntax required.
It's possible that if a user is copying a calculation from a textbook or Excel formula the syntax in MonitorPro may differ slightly. Typically if the user understands the calculation methodology it will be straightforward to add it in the syntax that MonitorPro requires. Generally, the user simply needs to ensure the amount of opening and closing brackets/parentheses are correct. To assist with this and to check the calculation's validity, users can use the Check Syntax button. A calculation with incorrect syntax can be saved by the user, but only as Inactive.
Prefix result with less than symbol - There may be scenarios where the user wishes to output the result with a 'less than' symbol when the incoming data also has a less than.
Assuming a less than multiplier of 1 is being used:
Without this prefix setting < 1 + < 1 would = 2
With this prefix setting on < 1 + < 1 would = < 2
Note
MonitorPro uses the less than to derive a numeric value for onward calculations and trending. Typically users leave the 'less than multiplier' which determines how to read the less than, as 1. In effect, less than 1 or < 1 will be treated as 1. In some cases, users will set the less than at 0.5, so < 1 will be treated as a value of 0.5.
Detection Limit - This option enables the user to set in effect a minimum value the calculation can produce. This is used to protect the accuracy of the incoming data or the calculation itself.
With a Detection Limit of 3, 1 + 1 = < 3
Non-numeric data - This allows users to manage how the Calculator treats non-numeric data it encounters. Users can control the text output to a set value, the text value found (such as Dry), or output no value at all.
Result Variable - This is where the result data will be saved. Typically this is a distinct Variable and should contain the correct Units for the data being output against it.
Result Data Source - The Data Source is typically set to a distinctively named Source such as Calculated. This enables data potentially against the same Variable to be clearly defined as being calculated in MonitorPro, as opposed to data imported from the Field, Device, or Lab.
Equally, users can set the output Data Source to be anything they choose or matched to the incoming data if consistent. If the user wishes to bring through the Source of the base data, but the base data includes multiple Data Sources, one 'primary' Data Source can be defined for the output. In the Result Data Source, drop-down choose [Copy Source From Primary Variable]. Then on the Rules tab check the Primary Variable tick box for the selected Primary Variable. This will default to the first Variable added to the calculation/first in order if not overridden.
Result Sample Type - The output data can be defined as a specific Sample Type if required. Leave this as [No Sample Type] where Sample Types are not being used/not applicable.
As with Data Source, the Sample Type of the output data can be set based on the incoming Sample Type of the Primary Variable. This is set the same way as above. There cannot be an independent Primary Variable for Data Source and Sample Type.
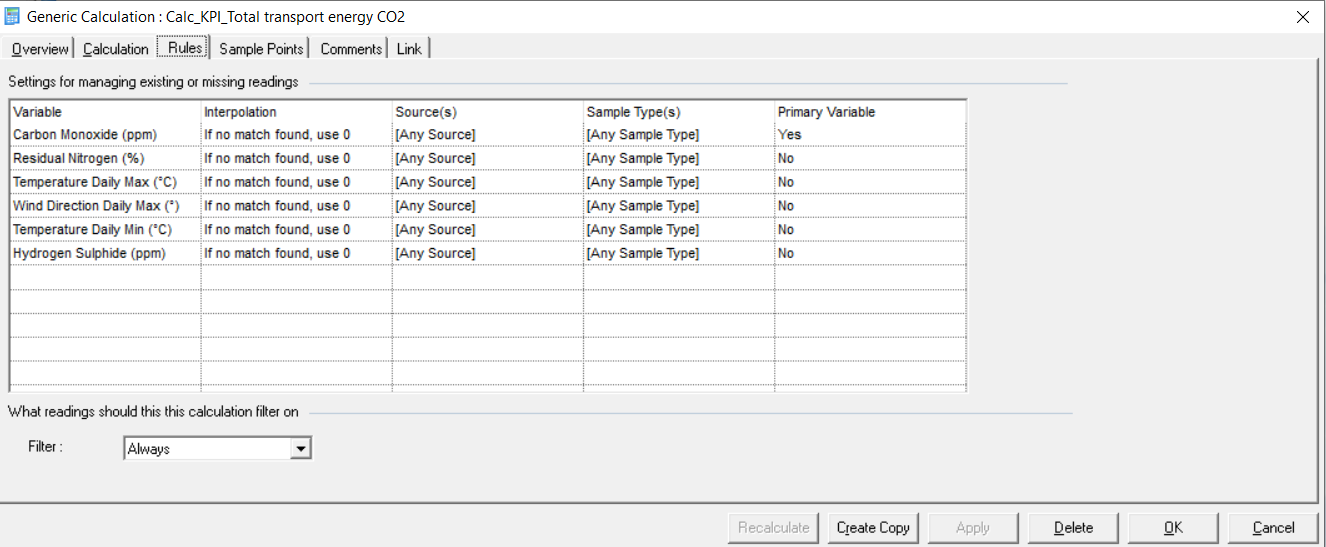
Rules tab
The Rules tab has a number of functions. To understand their purpose it's important to understand what triggers a calculation in MonitorPro. Assuming that the user is not manually running a calculation (perhaps to affect historical or already imported data), data will calculate automatically when it is imported. Effectively however data is added to the system MonitorPro will check to see if this data is part of any calculations and set them up to be triggered. The importation of a single value could then trigger off a calculation or trail of interconnected calculations (the resulting output of calculation A, is the input of calculation B), which has a much wider area of effect that might be immediately obvious. For more information on this also see the details on Calculation Ordering.
Interpolation
Interpolation is an important concept in the MonitorPro calculations set on the Rules tab. For example, a calculation that simply follows the logic of {Variable A} + {Variable B} = {Variable C} can be set up to produce different outcomes. The most common scenario is that you would want both Variable A and Variable B to be recorded at the same time and date to be summed together. By default, the Rule will be set to 'skip the calculation if no match is found'. It's therefore important to understand the base data when setting up the calculation logic, to ensure it will run automatically as expected. If the data does not match and the interpolation is not set, the calculation will not run.
Alternative options would be to use the nearest value if this is valid to do so, but the values to be combined do not fall on the same date/time. The interpolate next and previous options achieve a similar purpose but the user can decide if a value does not match, whether to force the previous or next value and not assume the nearest (which may or may not be the same).
The always-use interpolate option is typically used in meter reading type calculations where one reading is to be subtracted from a subsequent or future reading in time. So one value will always be imported and trigger the calculation to run, utilising the value recorded against the previous reading for example.
Assuming a fixed value
For example, in the below calculation, if data for one of the Variables isn't present, a 0 is substituted. This is typical and logical where the calculation is summing up a number of constituent parts into a common summary/totalised Variable. If no value is found, it's assumed to be 0 for the purpose of the sum/total.
Choose Data Source
This option allows the user to filter the incoming data of a particular Variable(s) to a select Data Source. This could be to intentionally exclude any unwanted data such as field data when the calculation needs to run only against defined laboratory data. From version 18 this will be a multi-select option.
Choose Sample Type
This option allows the user to filter the incoming data of a particular Variable(s) to a select Sample Type. This could be to intentionally exclude any unwanted data such as QA/QC data when the calculation needs to run only against the primary sampling data. From version 18 this will be a multi-select option.
Primary Variable
As mentioned above the Primary Variable is used in combination with the Data Source and Sample Type settings to copy specific information (from the Primary Variable) from the input to output data.
Filter
The filter option gives the user the option to refine the calculation to a specific period of time. Depending on which Filter option is selected: Fixed, Month, Day, Hour, the To options will change accordingly. For example, filtering to Hour will give the user the option of choosing a To and From hour. This would be typical if the user wants to filter a calculation to establish, for example a night and day rate. Other options would be to exclude or separate weekend values or calculations for differing seasons of the year. In these scenarios, create one calculation, use the Create Copy function, amend the logic to suit the changes (if any), and then amend the Filter to suit before saving. In effect, you have a pair of calculations with opposing Filters.
Sample Points
Choose the Sample Point(s) that are applicable to this calculation. Ideally if possible choose the Sample Points via a Sample Point Group. This enables calculations to be dynamically updated with a single update of the Sample Point Group and without the need to update potentially multiple calculations. Select Objects from the left (unselected) and move them to the right (selected).
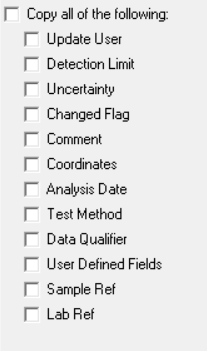
Metadata
Users can control what Metadata is copied across into calculated data. Choose the appropriate Metadata from the list to be included. What data is correct to copy will be contextual. Data for example made unique by Sample Ref will likely require the Sample Ref to be copied to the output data otherwise it will not remain unique and be overwritten. Where there are multiple input values the data will be copied from the Varaible set as Primary on the Rules tab.
Recalculate
As above, future calculations are triggered based on the importation of data. If there is existing data in the database, then users may wish to run the calculation against this historical data. If so choose to Recalculate. On saving a calculation a prompt will also be offered to recalculate.
Users can choose the date range of the data to calculate and then select either all or a subselect of the Sample Points contained in the calculation. When prompted, the users have the option of calculating locally or on the server. For any large volumes of data, it's recommended to allow this operation to complete on the server as it's more efficient this way. Completing this operation locally will lock other features of MonitorPro while in operation. Cancelling out of the operation while running may result in unexpected or part-completed outcomes.
Troubleshooting
There are a number of things to check if a calculation is not running as expected.
Inactive - If a calculation is not running at all then first check the Active check box is ticked. If not turn it on. To do so you may need to resolve the syntax of the calculation to enable this.
Ordering - If a calculation follows on from the output of another check to ensure they are in the correct order. The input into calculation B, from calculation A, needs to be performed before calculation B is run. If the data will calculate manually when the calculation is rerun, but will not on import of data then this is typically the problem. In All Calculations\Calculation Ordering set the order by using the up and down arrows. The default order will be that in which they were created, with the newest last. If the calculations were set up in a logical order, they should be in the correct order automatically.
Recalculating over manually edited data - The calculator will by default not overwrite manually edited or imported data. So if the data already exists, having been imported previously or edited afterwards, it may not update if the calculator is rerun. This is to protect the integrity of the data. This setting can be changed with caution in System Options.

Data Source/Sample Type mismatch - Check the base/input Data Source and Sample Type match any exclusions applied in the Rules tab of the calculation. If so amend the calculation or reimport the data with the correct Data Source/Sample Types.
Filtering - On the Rules tab check to see if there is any date/time filtering that would exclude the data being applied to the calculation.